

Linux에서 CAN driver를 사용할 일이 생겨서, CAN driver관련 문서를 공부하고 있다. 그 중, 리눅스 커널의 can 설명 파일을 보면서, 정리 차원에서 여기에 다시 작성해 보았다.
이 글은 다음의 리눅스 커널 CAN 네트워크 문서 내용이다.
https://www.kernel.org/doc/Documentation/networking/can.txt
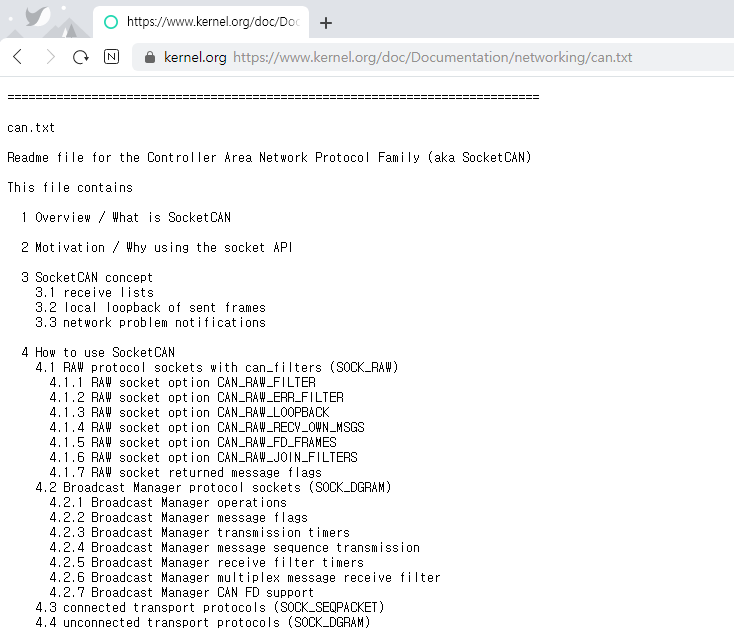
전체 내용은 8장까지 있으며, 내용은 다음과 같다.
  1 Overview / What is SocketCAN
  2 Motivation / Why using the socket API
  3 SocketCAN concept
    3.1 receive lists
    3.2 local loopback of sent frames
    3.3 network problem notifications

  4 How to use SocketCAN
    4.1 RAW protocol sockets with can_filters (SOCK_RAW)
    4.2 Broadcast Manager protocol sockets (SOCK_DGRAM)
    4.3 connected transport protocols (SOCK_SEQPACKET)
    4.4 unconnected transport protocols (SOCK_DGRAM)

  5 SocketCAN core module
    5.1 can.ko module params
    5.2 procfs content
    5.3 writing own CAN protocol modules

  6 CAN network drivers
    6.1 general settings
    6.2 local loopback of sent frames
    6.3 CAN controller hardware filters
    6.4 The virtual CAN driver (vcan)
    6.5 The CAN network device driver interface
      6.5.1 Netlink interface to set/get devices properties
      6.5.2 Setting the CAN bit-timing
      6.5.3 Starting and stopping the CAN network device
    6.6 CAN FD (flexible data rate) driver support
    6.7 supported CAN hardware

  7 SocketCAN resources

  8 Credits
이 내용을 바탕으로 SocketCAN의 사용법을 공부해 보았다.
리스트
SocketCAN의 이해
can 장치를 사용할 때, 옛날 방식은 /dev/can0 같은 문자 디바이스 파일을 직접 열고 read, write 하는 식이었다. 단순하긴 한데, 여러 프로그램이 동시에 CAN 버스에 접근하기도 어렵고 기능도 제한적이었다.
SocketCAN은 이것을 네트워크 소켓으로 풀어냈다. can0 같은 CAN 인터페이스를 이더넷 카드(eth0)처럼 하나의 네트워크 장치로 취급하는 거다. 덕분에 TCP/IP 소켓 다루듯 CAN 통신을 프로그래밍할 수 있게 됐다. 여러 앱에서 동시에 CAN 버스를 사용하는 건 기본이고, 특정 CAN ID만 골라 받는 필터링 같은 고급 기능도 쓰기 편해졌다. 한마디로 ‘근본’ 있는 방식이다.
CAN 2.0 통신 하기
자, 이제 바로 코드를 보면서 따라 해보자. 먼저 can-utils가 설치되어 있어야 하고 can0 인터페이스가 활성화되어 있어야 한다.
1. SocketCAN 사용 준비: 헤더 파일
가장 먼저 필요한 헤더 파일들을 포함 시켜야 한다. 소켓 프로그래밍에 필요한 기본 헤더와 CAN 통신을 위한 헤더다.
#include <stdio.h>
#include <stdlib.h>
#include <string.h>
#include <unistd.h>

#include <net/if.h>
#include <sys/ioctl.h>
#include <sys/socket.h>

#include <linux/can.h>
#include <linux/can/raw.h>linux/can.h와 linux/can/raw.h가 SocketCAN의 핵심이다.
2. 소켓 생성 – 통신의 시작
가장 먼저 socket() 함수로 통신을 위한 소켓을 만들어야 한다. 프로토콜 패밀리는 PF_CAN, 소켓 타입은 SOCK_RAW, 프로토콜은 CAN_RAW를 지정한다.
int s; // 소켓 파일 디스크립터

// PF_CAN 프로토콜 패밀리를 사용하는 RAW 소켓 생성
if ((s = socket(PF_CAN, SOCK_RAW, CAN_RAW)) < 0) {
    perror("Error while opening socket");
    return -1;
}여기서 에러가 나면 커널이 CAN 프로토콜을 지원하지 않는 것일 수 있다. modprobe can_raw 명령어로 모듈이 로드됐는지 확인해 보자.
3. 인터페이스 연결: 어디로 보낼까? (bind)
만든 소켓을 실제 CAN 인터페이스(예: can0)에 연결(bind)해야 한다. 인터페이스 이름을 주면 커널이 알아서 인덱스 번호를 찾아준다.
struct sockaddr_can addr;
struct ifreq ifr;

const char *ifname = "can0";

strcpy(ifr.ifr_name, ifname);
ioctl(s, SIOCGIFINDEX, &ifr); // 인터페이스 이름으로 인덱스 번호 가져오기

addr.can_family  = AF_CAN;
addr.can_ifindex = ifr.ifr_ifindex;

// 소켓을 can0 인터페이스에 바인딩
if (bind(s, (struct sockaddr *)&addr, sizeof(addr)) < 0) {
    perror("Error in socket bind");
    return -2;
}ioctl 호출이 핵심이다. 문자열 형태의 인터페이스 이름을 커널이 알아듣는 숫자 인덱스로 바꿔준다.
4. CAN 프레임 보내고 받기 (write/read)
이제 모든 준비가 끝났다. write()로 보내고 read()로 받으면 된다. CAN 프레임은 struct can_frame 구조체를 사용한다.
보내기 예제:
struct can_frame frame;

frame.can_id  = 0x123; // CAN ID
frame.can_dlc = 8;     // 데이터 길이 (Data Length Code)
strcpy((char *)frame.data, "hellocan"); // 보낼 데이터

// CAN 프레임 전송
if (write(s, &frame, sizeof(struct can_frame)) != sizeof(struct can_frame)) {
    perror("Write");
    return 1;
}can_id에 ID를, can_dlc에 데이터 길이를, data 배열에 실제 데이터를 담아 write하면 끝이다. 간단하다.
받기 예제:
struct can_frame frame;
int nbytes;

// CAN 프레임 수신 대기
nbytes = read(s, &frame, sizeof(struct can_frame));

if (nbytes < 0) {
    perror("Read");
    return 1;
}

printf("0x%03X [%d] ", frame.can_id, frame.can_dlc);
for (int i = 0; i < frame.can_dlc; i++) {
    printf("%02X ", frame.data[i]);
}
printf("\r\n");
read 함수는 데이터가 들어올 때까지 기다린다(blocking). 수신된 데이터는 frame 구조체에 채워진다.
향상된 CAN 통신 – CAN FD 통신 하기
CAN FD(Flexible Data-rate)는 한 번에 최대 64바이트까지 보낼 수 있고, 데이터 전송 구간의 속도를 높일 수 있어 훨씬 효율적이다. SocketCAN은 CAN FD도 아주 간단하게 지원한다.
1. CAN FD 모드 활성화
기존 RAW 소켓을 그대로 사용하되, 소켓 옵션 하나만 설정해주면 된다. CAN_RAW_FD_FRAMES 옵션을 켜주면 해당 소켓이 CAN FD 프레임을 처리할 수 있는 상태가 된다.
int enable_canfd = 1;
setsockopt(s, SOL_CAN_RAW, CAN_RAW_FD_FRAMES, &enable_canfd, sizeof(enable_canfd));이 코드 한 줄이면 CAN FD 준비는 끝이다. 이 옵션을 설정한 뒤에는 struct canfd_frame 구조체를 사용해야 한다.
2. CAN FD 프레임 보내고 받기 (예제 코드)
CAN FD는 struct canfd_frame 구조체를 쓴다. can_frame과 비슷하지만 데이터 배열 크기가 64바이트로 늘어났고, len 멤버가 can_dlc를 대신한다.
#include <linux/can/raw.h> // setsockopt를 위해 필요

// ... 소켓 생성 및 바인딩, FD 모드 활성화 ...

// CAN FD 프레임 보내기
struct canfd_frame fd_frame;
fd_frame.can_id = 0x456;
fd_frame.len = 64; // 데이터 길이 (0~64)
memset(fd_frame.data, 0xAA, 64); // 64바이트 데이터 채우기

if (write(s, &fd_frame, sizeof(struct canfd_frame)) != sizeof(struct canfd_frame)) {
    perror("Write CAN FD");
    return 1;
}

// CAN FD 프레임 받기
struct canfd_frame recv_fd_frame;
int nbytes = read(s, &recv_fd_frame, sizeof(struct canfd_frame));

if (nbytes < 0) {
    perror("Read CAN FD");
    return 1;
}

// 수신된 프레임이 일반 CAN인지 CAN FD인지 크기로 구분할 수 있다.
if (nbytes == CAN_MTU) {
    printf("Standard CAN frame received\n");
} else if (nbytes == CANFD_MTU) {
    printf("CAN FD frame received\n");
}

printf("ID: 0x%X, Length: %d, Data: ", recv_fd_frame.can_id, recv_fd_frame.len);
for (int i = 0; i < recv_fd_frame.len; i++) {
    printf("%02X ", recv_fd_frame.data[i]);
}

printf("\n");코드가 거의 똑같다. 구조체만 canfd_frame으로 바꾸고, len을 사용하면 된다. read로 받은 데이터의 크기(nbytes)를 CAN_MTU(16)와 CANFD_MTU(72)와 비교하면 일반 CAN 프레임인지, CAN FD 프레임인지 구분할 수 있다.
루프백(Loopback) 내가 보낸 메시지 받기
기본적으로 SocketCAN은 내가 보낸 메시지를 다시 나에게 되돌려준다(루프백). candump 같은 모니터링 툴을 동시에 돌릴 때 버스 상황을 정확히 보기 위해 필요한 기능이다.
하지만 때로는 내가 보낸 메시지를 다시 받는 게 불필요할 수 있다. 그럴 땐 루프백 기능을 끌 수 있다.
int loopback = 0; // 0 = 비활성화, 1 = 활성화 (기본값)
setsockopt(s, SOL_CAN_RAW, CAN_RAW_LOOPBACK, &loopback, sizeof(loopback));이렇게 하면 해당 소켓에서는 자신이 보낸 메시지를 다시 수신하지 않는다.
마치며
SocketCAN을 사용하면 리눅스에서 CAN 통신을 매우 쉽고 강력하게 구현할 수 있다. 오늘 살펴본 내용을 정리해 보면 딱 네 단계다.
- socket():
PF_CAN으로 소켓 열기 - bind(): 사용할 CAN 인터페이스(
can0)에 연결 - setsockopt(): 필요에 따라 CAN FD 모드를 켜거나 필터, 루프백 등을 설정
- write()/read():
can_frame또는canfd_frame구조체로 데이터를 주고 받기
이것만 기억하면 CAN이든 CAN FD든 문제없다. 이제 복잡한 문자 디바이스는 잊고, 표준 네트워크 소켓으로 깔끔하게 CAN 통신을 구현해 보자.